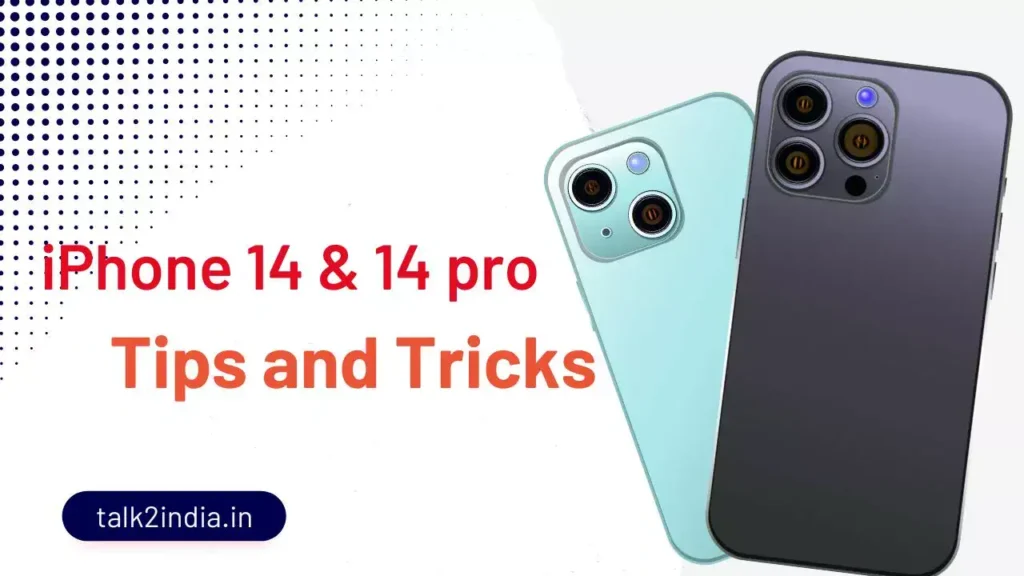
iPhone 14 & iPhone 14 Pro Tricks Make it More Than Just A Phone
If you’re a fan of the iPhone, there are a few iphone 14 pro and iPhone 14 tricks you can use to make your phone even more convenient and user-friendly. One such trick is to disable the headphone jack. This can save you a lot of time when using your phone and make it easier to connect with friends and family.
Apple has just announced the newest addition to its iPhone line- the iPhone 14. This latest model is a revised and updated design that offers many new features and tricks. One of the most exciting things about this phone is that it comes with a 13 megapixel camera that is capable of taking great photos and videos. The iPhone 14 also has a faster processor than the original iPhone, so you can expect amazing speeds when using this device. you can also explore Whatsapp tricks, Facebook Tricks, Instagram Tips,Snapchat Tricks and Twitter Hacks.
Lets Discuss Some iPhone 14 and iPhone 14 Pro Tricks
1. Enable the haptic keyboard
In iOS 16, Apple brought tactile feedback to its standard keyboard. Finally. That means that as typing you may detect subtle vibrations or taps beneath the screen. To enable it, open Settings, Sound and Haptics select ‘Keyboard Feedback’. Turn on the Haptic option.
2. Use the Always-On display feature with either your iPhone 14 Pro or iPhone 14 Pro Max
With the Always-On display The display on your iPhone 14 Pro or iPhone 14 Pro Max dims the Lock Screen while still showing important information such as times, widgets and wallpaper. All while using the latest technologies to make the display extremely energy efficient.
This is useful for when you need to check the time or other pertinent details from Your Lock Screen widgets without unlocking your iPhone and then going straight into an application.
The display is always active by intelligently reducing the brightness of its display and the rate at which it refreshes less than 1Hz in order to preserve battery life. Always-On display is enabled in default settings when you use the iPhone 14 Pro and iPhone 14 Pro Max. To turn off Always-On display or on Follow these steps:
- Navigate through Settings, then Display & Brightness.
- Scroll down until you reach Always On. switch off the Always-On display or on.
Also Read: Realme phones under 20000
3. Allow Startup Chime
Apple has made huge efforts to improve accessibility features available on iPhone models. Alongside Live Text, Apple Watch Mirroring and many more The iPhone 14 introduces the ability to play a chime whenever your iPhone is turned on or off. Similar to the Mac that also has distinct sounds when you turn on your Mac is turned on.
Like several of these accessibility features the iPhone 14’s start sound does not turn on by default.
- Start your settings application on your iPhone 14.
- Scroll down, then click accessibility..
- Keep scrolling until you are in the section for Hearing. section.
- Tap Audio/Visual.
- Press the toggle next Power On and On Sounds to enable this feature.
4. The indicator for battery percentage
As we discussed during our iOS 16 video previously that there’s a brand new indicator for the percentage of battery that you can turn on to show the exact percent of the battery on your bar of status. To enable it, navigate to the Settings > Battery and toggle on the option for ‘battery percentage.
5. Change the way you are notified
In default, with iOS 16 it now shows the number or ‘count’ notifications in lower right on the Lock Screen to let you know the amount of notifications to wait for. However, you can alter this to display the actual notification list or a number of notification windows.
Simply open Settings > Notifications, then choose one of the two options on the right of the screen, under “Display As’.
6. Make Your Videos Steady In Action Mode
Another feature that is coming for every iPhone 14 models is Action Mode. It’s basically, Apple has been able to improve image stabilization to the point where there is no need to use a gimbal for making videos. It’s not included by default, but making use of Action Mode is extremely easy.
- Start your camera application to your iPhone.
- In the bottom slider , above that button for Shutter, click the VIDEO button.
- Click the Action button at the top right corner.
In by default Action Mode is turned off, and is indicated by the line that runs through the icon in the Camera application. When it is enabled the icon changes hues, and a tiny pop-up message appears saying “ACTION MODE”. Simply tap the icon once more to disable Action Mode and another notification is displayed with the message “ACTION MODE Off”
7. You can manage Crash Detection for the iPhone 14 Pro
If the iPhone 14 Pro detects a serious crash in your car it will show an alert. It will then make an emergency call after 20 seconds , unless you decide to stop. If you’re not responding and you are not responding, you iPhone can play an audio signal to emergency services. It informs the emergency services that you’ve suffered an accident that was severe and provides them your longitudinal and latitudinal coordinates, along with an approximate radius of search.
If a crash is discovered and detected, Crash Detection cannot override existing emergency call made through other methods.
Crash Detection is turned on by default. It is possible to turn off alerts and emergency calls automatically from Apple following a serious crash on the road within Settings and Emergency Services. You can then switch off calls After severe crash. If you have apps from third parties installed to find crashes in your phone, they’ll continue to be alerted.
8. Notes can be locked behind Face ID.
In Notes you can now make a note secure with the faceID authentication. It’s no longer restricted to locking it using the passcode on your phone. In order to enable the feature, open Settings > Notes, then locate the option ‘Password’ and tap it. The next screen will show the option to use the Device Passcode’ option and switch to the switch to ‘Use FaceID’. You don’t need to enter a password to unlock your notes.
To lock a particular note, simply press long on the note you wish to lock in the app. Then, select ‘lock note’ from the pop-up menu which appears. The next time you attempt to access it, it will utilize FaceID to verify that you are trying to get into it.
9. Remove duplicate photos
Apple’s most recent Photos app allows you to quickly and easily eliminate duplicate photos. This will assist you in saving iPhone as well as iCloud storage.
Simply open Photos and click on the ‘Albums’ tab. Scroll down until you’ll see “Duplicates” close to the end on the screen. You can then select’merge’ at the top of every match, or click “select” on the top, and then select each picture manually you wish to delete, and then click the delete trash icon that is at the bottom of the page.
10. Transfer Your SIM
The first time, Apple has released an iPhone model that doesn’t come with the physical SIM tray for cards. Instead, you’ll have to use the eSIM card, which is supported by all big carriers across the U.S. If you’re upgrading from an older iPhone to the brand new iPhone 14, Apple makes it (relatively) simple to transfer your phone number onto your new iPhone.
- Make sure that your old iPhone is within reach (within just a few feet).
- Go to your settings App to your iPhone.
- Tap Cellular.
- In under the section eSIMs section Tap the eSIMs section and then add it.
- On on the transfer your phone number page, click to the Transfer to an additional iPhone option.
- Follow the instructions on the screen in order to finish the transfer.
11. Utilize Emergency SOS by satellite via satellite iPhone 14
Utilizing this iPhone 14 trick, you can utilize Emergency SOS via satellite to message emergency services when you’re without Wi-Fi or cellular coverage.
Emergency SOS through satellites will allow you to connect to emergency services in extreme situations when no other methods for contacting emergency services is accessible. If you make a call or send a text message to emergency services but aren’t able to connect because you’re not within the coverage of cell and Wi-Fi coverage Your iPhone attempts to connect you through satellite to get the assistance you require.
If you have to call emergency services, follow these steps to connect your phone to a satellite
- Place your phone comfortably in your palm. It’s not necessary to lift either your arms or keep the phone, but do not place it in a purse or bag.
- Be sure to be outside and have clear views of the sky as well as the Horizon.
- Take note that trees with lighter foliage could slow the connection down while dense foliage could hinder it. Canyons, hills, mountains and tall structures may hinder the connection.
- If you have to change direction from left to right or change direction to avoid a signal that is blocked or signal, your iPhone will guide you. Just follow the directions on the screen.
To text emergency services satellite
- Try calling emergency assistance. Even if the normal mobile carrier’s network isn’t in use however, you might be in a position to call.
- If your call doesn’t connect If you’re not able to connect, you can text emergency assistance via satellite:
- Tap Emergency Text by Satellite.
- It is also possible to go to Text 911 to send messages or SOS and then select Emergency Services.
- Tap Report Emergencies.
- By tapping a few times, you can respond to the questions in an emergency to explain your situation.
- You may also decide to inform emergency contacts that you have contacted emergency services, as well as your location and the type of the emergency.
- To connect to satellites Follow the instructions on screen.
- Once connected, you can continue following the instructions on screen to stay connected until you text emergency services.
- After connecting and connected, your iPhone begins a texting conversation with emergency personnel by providing vital information, such as the details of your Medical Identification Number and Emergency Contact number (if you’ve created them) as well as the answers to the emergency questionnaire and your place of residence (including elevation) as well as the remaining battery life of your iPhone.
12. Share and view saved Wi-Fi passwords
Apple has been allowing iOS users to connect to Wi-Fi quite a while however, only when you place two Apple devices close to one another. In the event that this feature did not automatically function, you weren’t able to simply pull that password in your setting. In addition, if you wanted to share your saved Wi-Fi password to another person, such as someone who is an Android users or those using computer, you would need be able to remember the password. Until now.
On Settings In Settings, select WiFi and then tap the tiny details icon on left of the connection that you would like to change the password of. To view the password of the network you need to tap on the “Password” section, then tap Face ID or type in your passcode to see the password. After that, you can press copy and copy your password to your clipboard. Share it with others.
13. Switch macro mode manually on or off
Another option that is useful is the macro mode switch that you can manually select as for the last few phone models, the automatic switching between macro and 1x could be quite jarring. Go to Settings > Camera and select the “Macro Control Switch.
Start the camera app, and move your camera towards an object. You’ll see the macro logo appearing as yellow in the display. It’s automatically enabled however if you wish to turn it off, simply press the logo whenever it appears.
14. Personalise Spatial Audio
In iOS 16 there’s an interesting feature that makes use of the front-facing FaceID sensors to customize the Spatial Audio on your AirPods. It’s compatible in conjunction with AirPods 3, and AirPods Pro (first and second generation).
To get it working, start to your AirPods case, ensure they’re connected and then open the Settings app. Click on AirPods from the drop-down menu, and then on the next screen, you will see “Personalised Spatial Audio”. Tap the ‘Personalise Audio’ button on the next screen.
15. Find your top tabs on Safari
Safari limit the number of tabs that you can open to 500. If you’re close to that limit, it may be a bit difficult to find the specific tab you’re searching for. You can scroll forever however, there’s an easier method to locate the exact tab you’re searching for.
When you open Safari In Safari, if you hold down when you are on any active tab You now have the option of hitting Pin Tab. This will shift the tab up to the very top of Safari and it appears as a tiny preview of the tab that is permanently pinned and you can click to open.
If you hold down and unpin a tab will first appear on your tab grid that has open tabs.
16. Guard Your Screen
In the iPhone 12 series, Apple introduced a brand new “Ceramic Shield” for the screen. The theory behind this is that it’s intended to protect against any cracks you could suffer if you fall your phone. Since the time, Ceramic Shield has made its return to the iPhone 13 and now iPhone 14.
17. Recover chats that were deleted recently in Message
If you’re a regular user of deleting messages within the Message app, and then happen to need the messages at a later date in time, you are able to restore deleted messages on the iPhone 14 Pro. The deleted messages are transferred into the Recently Deleted folder in the Message app. Here’s how to get access to this folder. Recently Deleted folder in Message,
- Start the app. Open the application.
- Click on the Edit button in the upper left.
- Choose the Recently deleted folder.
- Select the chat that you would like to recover and retrieve the conversations from.
Note that deleted messages will remain within the Recently Deleted folder for 30 days after which messages will be permanently deleted.
18. Quick Note
iOS comes with a feature known as Quick Note that lets you easily begin making notes in your Notes app. You just need to go to Control Centre and find the button that resembles an actual note page, and then tap the plus icon. Click it and you’ll instantly begin a new note in Notes. Notes app.
19. Back tap to capture
It’s a neat technique that lets you tap three or two times at the bottom of the iPhone to do things like taking a picture or dropping down notifications. It’s one of accessibility’s settings.
Go to Settings > Accessibility, and you’ll see the option ‘Touch’. In the lower part of the screen that follows, you’ll find the option to back Tap’. Choose ‘Double Tap and select’screenshot from the options or any other option you’d like to. When you double tap on the rear of the phone screen, it will take a picture.
20. Make Siri listen longer
As we’re discussing the topic of Siri improvements, let’s chat about an accessibility option Apple has actually announced back in May, just a month prior to the release of its iOS 16 preview. In the past, Apple promised a host of accessibility features would be available for the iPhone as well. One of the features that I was interested in was the capability to alter the pause time of Siri.
By adjusting the pause time, you can cause the assistant to wait longer before it can respond in response to your requests. It’s an ideal option for those with a speech impairment and hearing, but when you’re trying to finish an Siri instruction before Siri is ready to jump to action, then you’ll be happy with this iOS 16 update too.
- Navigate to settings.
- Tap Accessibility.
- Touch Siri.
21. Merge Duplicate Contacts
If you find that your Contacts app is filled with duplicates you’ve not managed to get rid of and you’ll find this iPhone 14 Pro tricks is ideal for you. The new update comes with a feature to merge duplicate contacts, which solves problems that involve multiple contacts once and for all.
The iOS 16 Contacts app, If there is more than one card from the same person The app will identify the duplicate and let you know that duplicates were discovered.
22. The one-handed option (aka Reachability)
There’s an option in iOS that allows you to reach the highest point of the screen by using just one hand, or, more technically, your thumb. It’s known as Reachability and, when it’s active, all you need simply swipe down to the lower part of the screen, and it will lower the top of the screen, making it easier to reach.
Simply open the Settings menu, then Accessibility and finally Touch, and switch on “Reachability”.
Do you want all your photos to share the same look or do you have any changes you’d like to make to a whole batch of photos? It’s possible with the iPhone 14 Pro tricks, that lets you copy edits of one image and then apply them to a different image with just a touch. Here’s how:
- Start Pictures and then select the image you want to edit.
- Press to the 3 Dots on the upper right.
- Press the Copy Editors.
- Navigate to the image you wish to edit on and then press to the Three Dots at the top right.
- Tap Paste Edits and done.
- The same changes are applied to the image, too.
23. The Sort playlists are available in Apple Music
Playlists are fantastic however, in Apple Music they’re fixed in the order you set them in. If you’d like to alter the order, you’ll need open the editor and perform the change manually. With this secret iPhone 14 Pro trick, it is possible to sort Playlists by artist, title album, title, or release date.
24. Use Face ID when in Landscape Mode.
It’s true that the iPhone 14 Pro models support Face ID in landscape mode which makes it much easier to lock the iPhone when it’s not in the traditional portrait orientation.
25. Lock Notes that have an Passcode
Instead of creating a new password for your note, you can just use your device’s passcode or Touch or Face ID to lock your note and it’s much simpler.
- Start your Notes application.
- Tap and hold the note you wish to secure.
- Choose the Lock Note.
- Click Enter iPhone Passcode.
26. Allow haptic feedback on the Keyboard
There’s a keyboard option available in iPhone 14 Pro that lets users enable haptic feedback that can be felt while typing. The vibrations will be generated for each key press, giving users a tangible confirmation that the letter was press. Here’s how to activate it:
- Navigate to the Settings.
- Tap Haptics and Sounds.
- Choose the Keyboard and Feedback.
- Turn off the Haptic.
27. Convert currencies using the Camera
Currency conversion is an efficient tool that will keep your pocket from a loss from over-priced offers, especially when you travel abroad a frequently. Most of the time, we surf the internet for ways to convert currencies. This method can be complicated, particularly if you’re planning to travel to another country. However, with this clever iPhone 14 Pro trick, you can convert currencies directly from your camera and not have to enter manually the values of currency on the internet.
Here’s how you can convert currencies directly using the camera on your iPhone:
- Start your camera and point it at the text.
- Click on the scan icon in the lower right corner.
- Once you’re done When you’re done, press to the Convert icon to the lower left.
- Now you can check the value of your currency converted!
Conclusion:
In conclusion,if you’re looking for iPhone 14 tricks, here are a few to help you get the most out of your device:
- Set up a Notification Centre so you have quick and easy access to all your notifications.
- Get more from your limited storage space by using apps that optimize or add additional storage space.
- Create a custom wallpaper or photo album to showcase your favorite photos and videos.
- Use the lock screen shortcuts to quickly open commonly used applications and tasks.
Follow Talk2india on Facebook, Instagram, Youtube and Twitter.